Pin Curls, Pomade, and Staying Power: Your No-Fail Guide to Mastering Vintage Hairstyles That Hold All Day
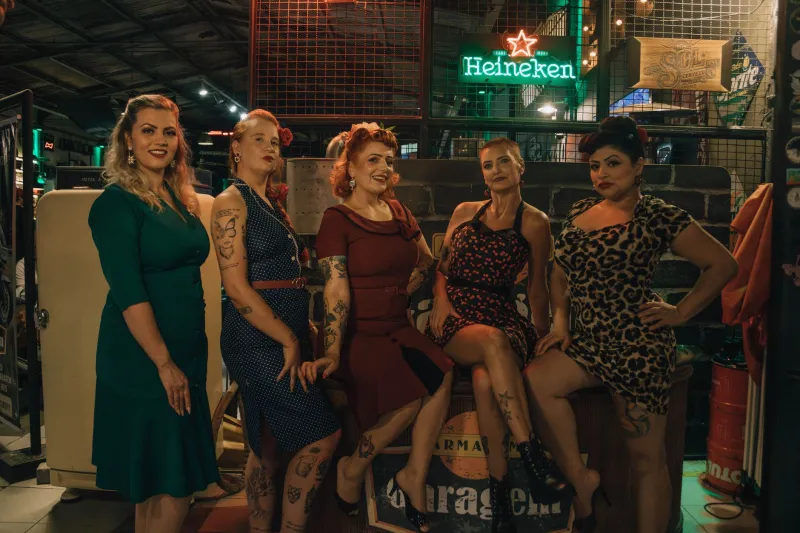
Let's talk about hair. Specifically, the kind of hair that makes people stop you in the grocery store, the kind that photographs like a dream, the kind that sits on your head looking like it was styled by a Hollywood studio assistant in 1953. We're talking victory rolls. Pin curls. Finger waves. The whole gorgeous, architectural vocabulary of mid-century American beauty.
The reason these styles feel intimidating is that most people approach them the wrong way — grabbing a curling iron, winging it, and then wondering why the result looks nothing like a Vargas illustration. Vintage hairstyling has a logic to it, a specific sequence of steps built on techniques developed by women who needed their hair to last through a full day of work, a wartime factory shift, or a Saturday night at the dance hall. Once you understand that logic, everything clicks.
Why Vintage Techniques Actually Work Better Than You Think
Here's the foundational truth about pin-up era hairstyling: it was designed for longevity. Women in the 1940s and 1950s didn't have access to the kind of heat-styling tools we use today, so they developed wet-setting methods — pin curls, roller sets, rag curls — that created curl patterns baked into the hair's structure as it dried. The result was a set that could last for days, not hours.
Modern stylists who specialize in vintage work — and there are more of them than you might expect, working out of retro-themed salons in cities like Nashville, Portland, and Brooklyn — consistently point to this as the key insight beginners miss. If you set your hair wet and let it dry completely before styling, you'll get results that a curling iron used on dry hair simply cannot replicate. The curl is deeper, more defined, and far more durable.
The other thing modern vintage stylists emphasize: product is not optional. The right products at the right stage of the process are what separate a beautiful vintage set from a frizzy approximation of one.
Victory Rolls: Step by Step, No Shortcuts
Victory rolls are the signature of pin-up hairstyling — those smooth, cylindrical rolls of hair that frame the face like a crown. They look complex. They're actually more forgiving than they appear once you know the mechanics.
What you'll need: A fine-tooth rattail comb, strong-hold hairspray, bobby pins (lots of them — buy the value pack), a light-hold pomade or styling wax, and a teasing brush.
Step one: Section and prep. Take a section of hair from the front of your head — roughly from one temple to the other, about two inches deep. Clip the rest of your hair out of the way. Mist this section lightly with water or a setting spray to give it some grip.
Step two: Backcomb the base. Using your teasing brush, gently backcomb the underside of your section to create volume and texture. This is your internal scaffolding — it's what gives the roll its body and keeps it from collapsing. Don't skip this step.
Step three: Roll, don't fold. Smooth the top surface of your section with your fingers or a bristle brush, then begin rolling the hair toward your face and up, tucking the ends underneath as you go. The goal is a smooth, cylindrical shape — think of rolling a piece of paper into a tube. Use your fingers to guide the roll and keep it tight.
Step four: Pin and secure. Once your roll is shaped, slide bobby pins through the base of the roll into the backcombed section underneath, crisscrossing the pins for maximum hold. Spray with a firm-hold hairspray and let it set for at least two minutes before touching it.
Repeat on the other side, and you have the foundation of a classic victory roll style. With practice, the whole process takes about fifteen minutes.
Pin Curls: The Overnight Investment That Pays Off Beautifully
If victory rolls are the dramatic leading lady of vintage hairstyling, pin curls are the reliable character actress — not always the star, but absolutely essential to the whole production.
Pin curls are small, flat coils of hair secured against the scalp with bobby pins and left to set — ideally overnight under a silk scarf or a vintage-style hair net. When released in the morning, they produce soft, defined waves and curls that can be brushed out into everything from loose retro waves to tight ringlets depending on the size of the curl and the direction it was set.
The technique: Working on damp hair that's been treated with a curl-enhancing mousse or setting lotion, take a small section (about an inch wide), wrap it smoothly around your finger in the direction you want the curl to fall, then slide your finger out and pin the coil flat against your head. The direction matters — curls all wound in the same direction will brush out into smooth, consistent waves, while alternating directions create a fuller, more voluminous result.
For product, a water-based setting lotion like Murray's Beeswax, Lottabody, or the widely available Garnier Fructis Curl Treat work well for most hair types. On thicker or more resistant hair, a light hold gel provides extra definition without the crunch.
Finger Waves: The Most Glamorous Thing You Can Do in Twenty Minutes
Finger waves are the style most people assume requires professional help. They don't — but they do require patience and a specific product: a strong-hold styling gel with a smooth, non-flaking formula.
The technique involves molding damp, gel-saturated hair into S-shaped waves using your fingers and a fine-tooth comb, then securing each wave with clips (the long, flat kind called wave clips or duck-bill clips) and allowing the hair to dry completely before removing them.
The key to crisp, defined finger waves is working quickly and keeping the hair very wet with gel throughout the process. If the hair starts to dry before you've finished shaping, the waves will be soft and undefined. Revisit each section with a little more gel and a mist of water if you need to.
For Black women and women with natural curl patterns, finger waves are a particularly beautiful option — the natural texture provides built-in grip and definition that makes the style even more striking. Many natural hair stylists working in the vintage space have developed techniques specifically adapted for natural textures, and their tutorials (widely available on YouTube) are an invaluable resource.
Products Worth Knowing About
The vintage hair community has strong opinions about products, and after enough trial and error, a few names come up consistently. Suavecito Pomade (available at most beauty supply stores and Target) is a water-based, medium-hold pomade that works beautifully for smoothing and shaping without leaving hair stiff. Eco Style Olive Oil Gel is a cult favorite for finger waves and pin curls on a budget. Got2b Glued Blasting Freeze Spray is the heavy-duty option for victory rolls that need to survive a full day out. And Kenra Platinum Silkening Mist is the finishing product that gives vintage styles that smooth, glossy quality you see in classic photography.
The Practice Factor (And Why It's Worth It)
Every vintage hair stylist will tell you the same thing: these styles require repetition before they feel natural. Your first victory roll will probably be lopsided. Your first attempt at finger waves may look more like finger suggestions. That's completely normal and absolutely fine.
The women who wear these styles effortlessly today have practiced. They've watched tutorials, they've pinned their hair on lazy Sunday afternoons just to get the muscle memory down, they've made mistakes and learned from them. The skill is entirely learnable — it just takes the same patience and repetition that any other technical skill requires.
And the payoff, when you finally get it right and catch a glimpse of yourself in the mirror with a perfect set of victory rolls sitting just so above your temples? Worth every single bobby pin.